Is that a watermelon under your dress or are you just happy to see me?
Well arties, it's true. It isn't a watermelon under my dress, but it is a growing Little French Fry, due December 25.
One of my 2nd grade classes has started to come up with names for Little French Fry and every week before I gather them on the rug, they can't WAIT to share their baby names. For example:
Student 1: How about Princess?
Student 2: No no, Princess Sparkles!
Student 3: How about Ruley, Mrs. Donelan?
Miss FF: Ummm, Ruley? Why?
Student 3: Ruley, like RULES. Because you like RULES so much Mrs. Donelan!
Ya got me kid. Ya really got me.
I've been having lots o' fun decorating the nursery for Little French Fry and finding thrifted stuff to decorate it up. A few weeks back I picked up a table from Goodwill for $2.50 that definitely had a modern vibe about it. The crazy thing seems to be made of broom handles for legs. The top was really chewed up and water stained though.


But, it was nothing a little sanding and a can of glossy spray paint couldn't fix! Perfect for a mod side table.

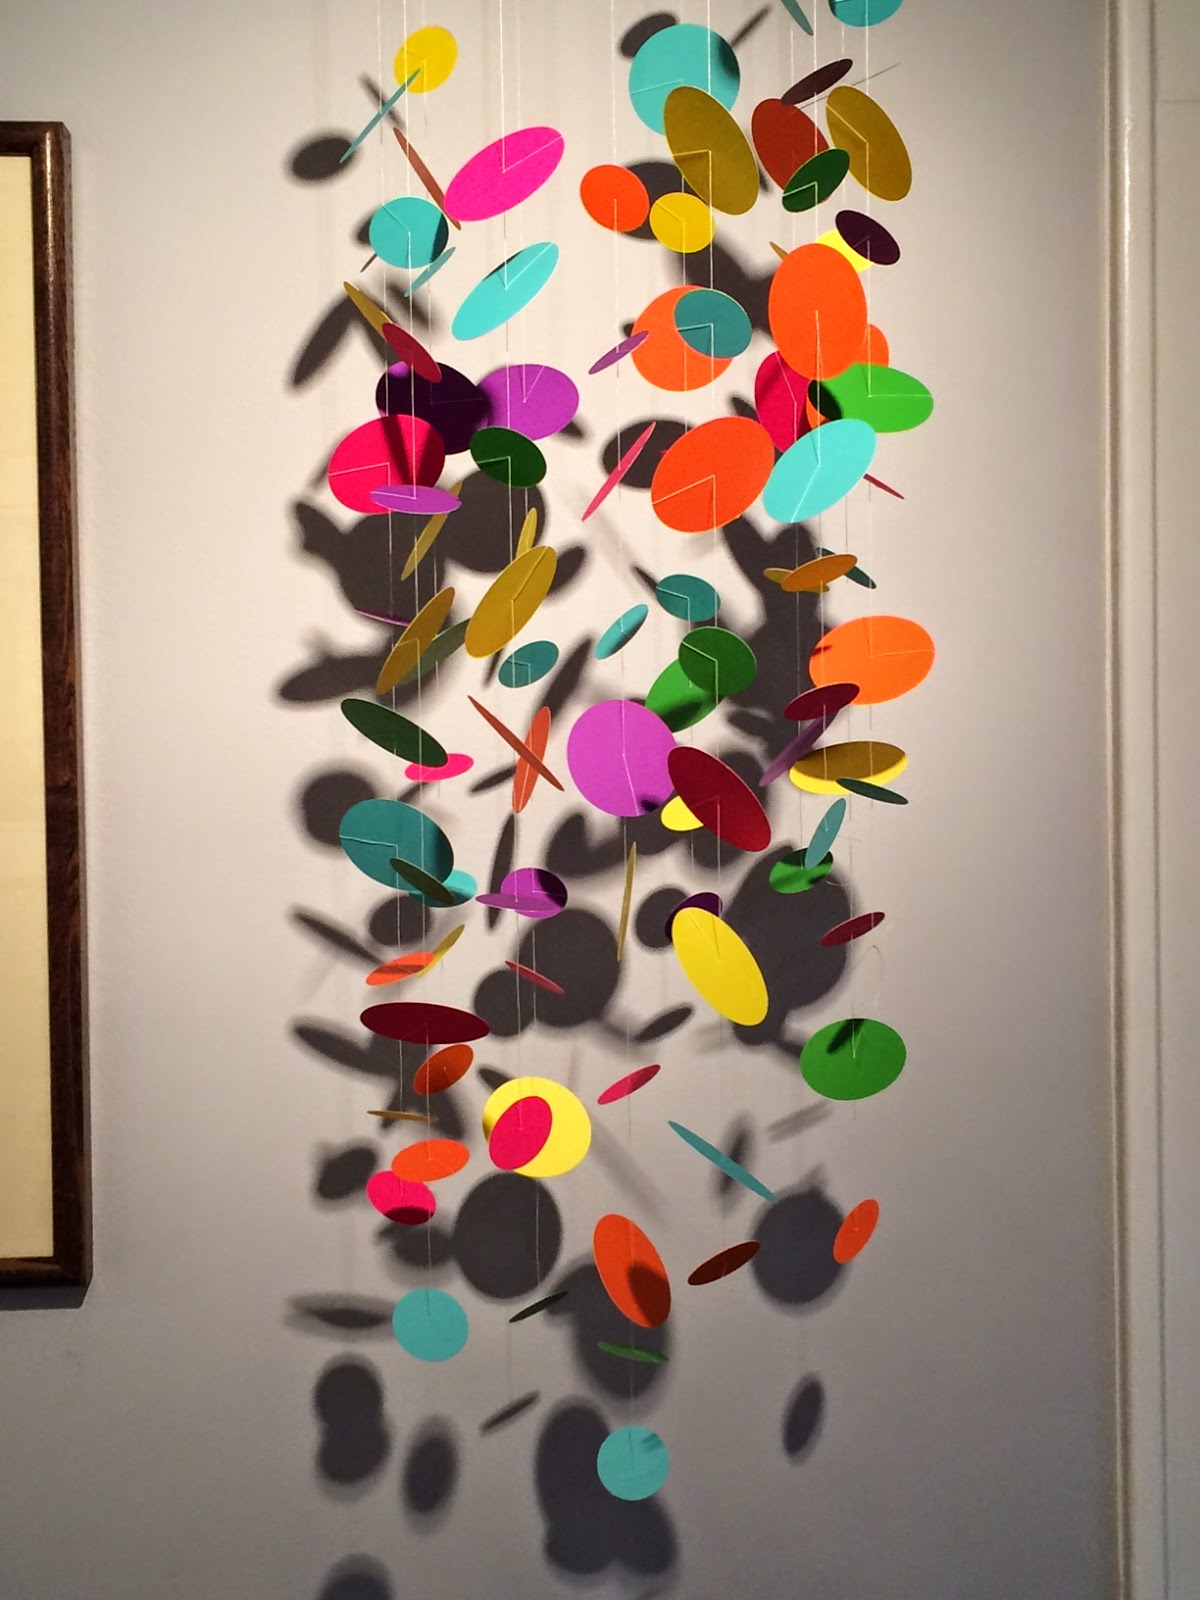
And as for the mobile. I've made mobiles for my gal pals in the past (see here and here) and really wanted to make one for our dear little French Fry. I had my eye on a few through Etsy, but when one of them didn't pan out, I gathered my energy and got to work!
I bought a bunch of bright colored cardstock from Michaels and used my die cutter at school to whip out a bunch of different sized circles.


 Then, while multitasking and catching up on some Homeland, I got to work threading the circles together to get a random assortment of sizes and colors.
And below is the final product in baby French Fry's room. The hubs tied on a fishing swivel so it could spin around (like a record baby, right round, round round). It is truly mobile-y; the slightest breeze gets this baby moving!


More photos of baby French Fry's room to come. And I'm sure, more awesome 2nd grade names for baby French Fry to come as well...
Well arties, it's true. It isn't a watermelon under my dress, but it is a growing Little French Fry, due December 25.
One of my 2nd grade classes has started to come up with names for Little French Fry and every week before I gather them on the rug, they can't WAIT to share their baby names. For example:
Student 1: How about Princess?
Student 2: No no, Princess Sparkles!
Student 3: How about Ruley, Mrs. Donelan?
Miss FF: Ummm, Ruley? Why?
Student 3: Ruley, like RULES. Because you like RULES so much Mrs. Donelan!
Ya got me kid. Ya really got me.
I've been having lots o' fun decorating the nursery for Little French Fry and finding thrifted stuff to decorate it up. A few weeks back I picked up a table from Goodwill for $2.50 that definitely had a modern vibe about it. The crazy thing seems to be made of broom handles for legs. The top was really chewed up and water stained though.
But, it was nothing a little sanding and a can of glossy spray paint couldn't fix! Perfect for a mod side table.
And as for the mobile. I've made mobiles for my gal pals in the past (see here and here) and really wanted to make one for our dear little French Fry. I had my eye on a few through Etsy, but when one of them didn't pan out, I gathered my energy and got to work!
I bought a bunch of bright colored cardstock from Michaels and used my die cutter at school to whip out a bunch of different sized circles.
And below is the final product in baby French Fry's room. The hubs tied on a fishing swivel so it could spin around (like a record baby, right round, round round). It is truly mobile-y; the slightest breeze gets this baby moving!
More photos of baby French Fry's room to come. And I'm sure, more awesome 2nd grade names for baby French Fry to come as well...


