Sunday, April 13, 2014

Mondrian Masterpieces.

My Kinder artists finally finished up our Mondrian paintings I had started blogging about here.  And can I just say...I want to frame them ALLLLL.


After reading Michael Hall's Perfect Square and studying many examples of Mondrian's works, the children had to pick and stick with one chosen shape.

I pre-cut large circles, triangles, squares, and rectangles for the kids to use as a tracer.  After they traced their chosen large shape with a black crayon, they drew their same shape again and again and again...


During our next class, we dug into our tempera cakes making sure our brushes were very GLAD (not sad) the whole time.


When my Kinders are painting, I like to remind them to dip, dip, wipe, wipe, then DOT, DOT into the paint.  It helps them to keep the paints clean, plus I love hearing them cheer out loud to "dip, dip, wipe, wipe, dot, dot" in their little voices.


After painting with tempera paints, students were in charge of picking out oil pastels to accent their paintings.  We discussed complementary and analogous colors on our color wheel to figure out what colors would POP in our paintings.


I can't get enough of these colors and want to wallpaper my entire Art Room with these paintings.  Mondrian-a-licious!

Thursday, April 10, 2014

Smock Yeah!

Heya Arties!  Do any of you out there have that one art room peeve that makes you off-your-art-rockers CRAZAY?

My top peeve (amongst the couple of other ones I have, such as kiddos digging for gold up their little noses and those few students who are constantly word vomiting during my directions) is students asking me where their wet paintings go.

I have taught my students for quite a few years now and some of them (5th graders even!) will STILL come up to me, shove a wet painting at my nose, and ask "Where should I put it?"

Usually I respond with a deep breath and a "I do not need a wet painting.  Where would it live?"  On my days without enough coffee, my internal response probably sounds something like, "Well, kid, I'll tell ya where to put it..."  Juuuuust kidding.

Below is my quick and easy fix to ensure I don't lose my bananas one of these days.


Here's a close-up of this smock-a-roo.


Now when my students ask me where their wet paintings go, I just do a simple point to my smock, and keep on keepin' on.

I'd love to hear what your tips and tricks are for peeves such as these!

Wednesday, April 9, 2014

DIY Sped Adaptations in the Art Room.

After looking at the variety of backgrounds my students created during our recent Magritte Moon Trees, I was struck not only by the gorgeous colors, but by the following two paintings.  The first painting is a lovely example of a student who followed the directions to use cool colors to create their sky and landscape background to a "T".


Now, the second painting is an example from one of my students on the spectrum.  This young artist is absolutely amazing.  He'll appear like he's zoning out for my entire demonstration and/or discussion and then raise his hand and say the most beautiful and insightful thing.  The work that this child produces definitely has a unique style.  Though this is only the background for his project, this paper itself is frameworthy for sure!


After looking at these paintings, I started to think about some of the tools I use in my Art Room for my students with special needs.  I've blogged a little bit about the supports I use in my room here, and I thought I'd continue my previous train of thought just a lil' bit.  As a former Special Education teacher, I am always on the hunt for different ways to adapt everyday art tools, so below is a glimpse into these adaptations.


I like to use the chunky Ticonderoga pencils in my room.  They are super smooth for writing and drawing and the lead is very sturdy so they barely break.  For some of my kiddos with fine motor difficulties, a rubber band wrapped near the top encourages children to hold onto it with their thumb and index finger.  The rubber band leaves a nice little tail for children to grasp with their additional fingers.


I always have one of these fidget balls on hand for any students with sensory needs too.  Students with anxiety may use this to secretly hold and squish in their hands while I'm giving a demonstration or leading a discussion.  I have a few friends too who hold onto this with their non-dominant hand while painting, drawing, etc. because it keeps both hands occupied.


These google eye rings are the BEST.  I used these as a Kindergarten teacher, a Sped. teacher, and now in my Art Room.  These goofy rings actually help students self-check and self-assess their pencil/crayon/brush grip.  If the student is holding their tool accurately, then the art eyes are always watching.  If the grasp is incorrect, then that signals to the child to readjust his or her grip.


I've also got a few pads of felt scraps always on hand.  The felt is a nice sensory texture tool to use with students on the spectrum.  It gives their hands something safe and sensory to touch and is used similarly like the fidget ball above.  Depending on the child, the felt pad can be placed on the table or in the child's lap.


For some students with difficulties in writing, a slant board works well to encourage appropriate letter formation and posture, or in the case of art, appropriate artistic techniques.  Because I don't have slant boards available in my room, a 3"(or more) binder works really well too!

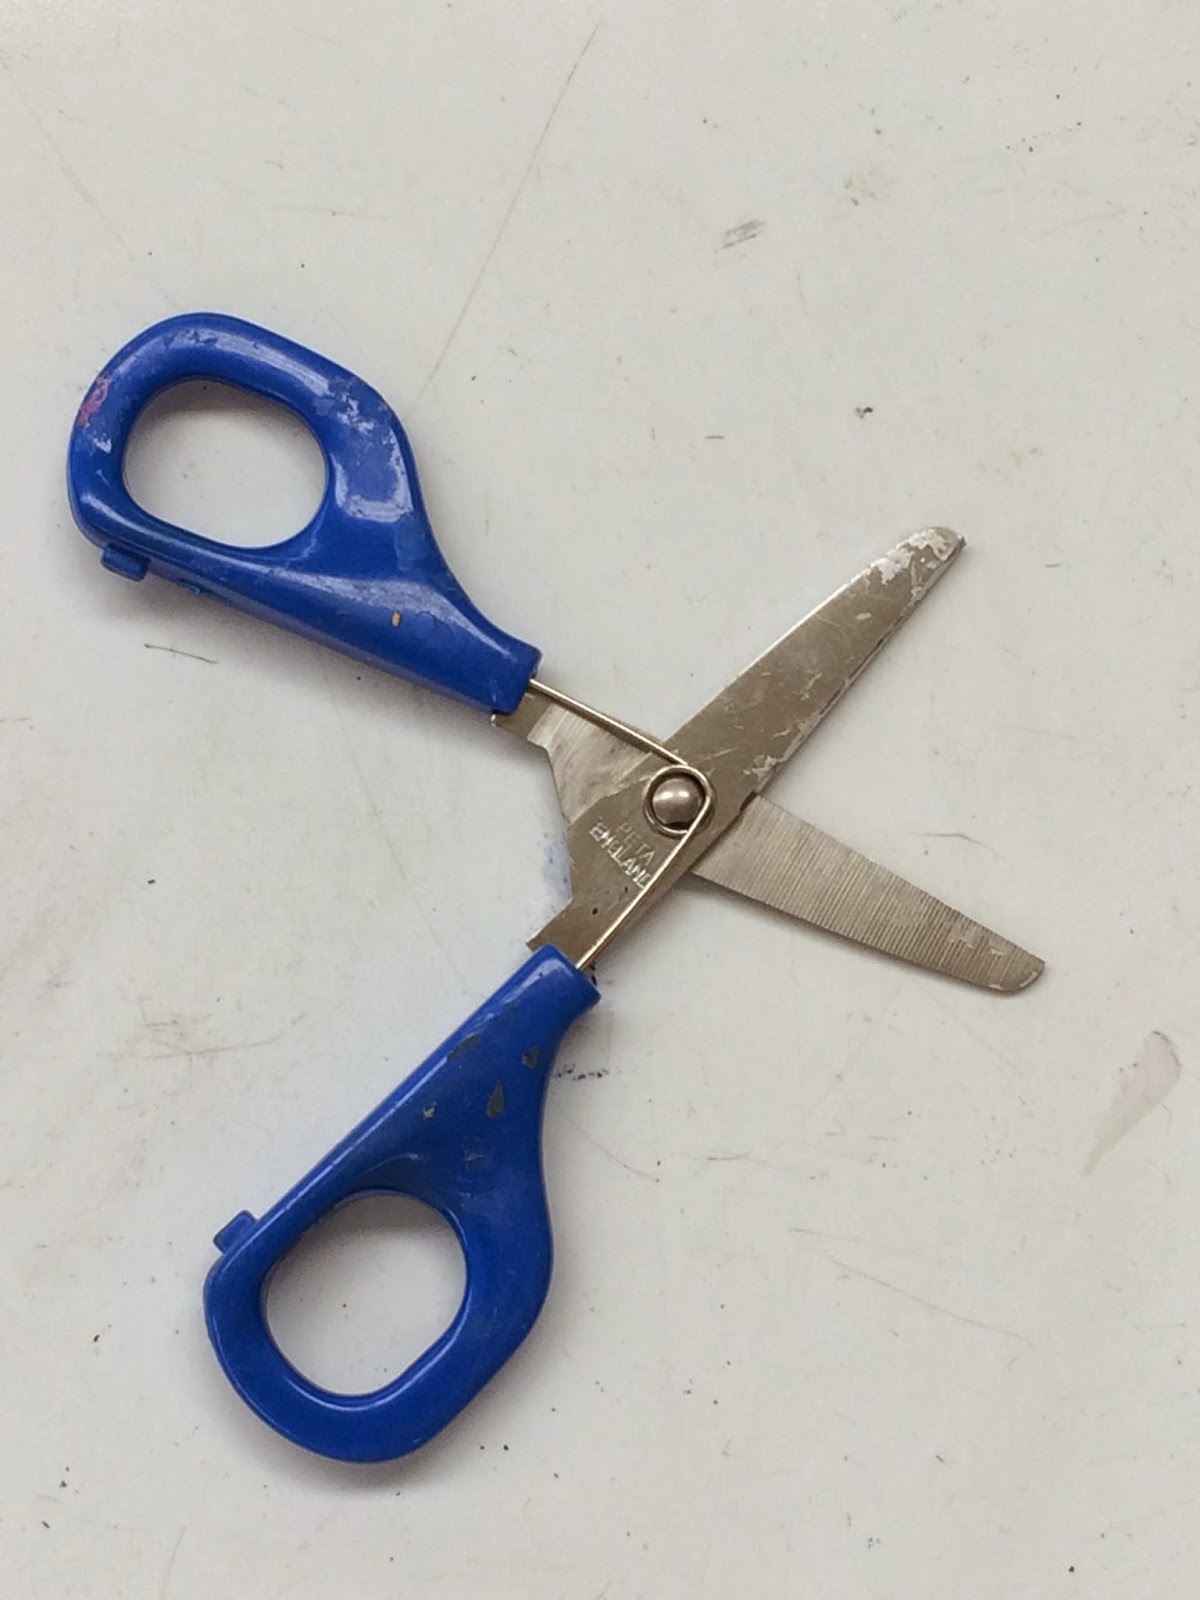
And finally, these last tools below work really well for students with difficulties in motor skills.  The bouncy self-opening scissors are a great tool for students with weak hands.


Annnnnd, the sponges below are also a great alternative to brushes if students have difficulty grasping a paintbrush.  The wood handle sponge and the clothespin sponge allow students to experience painting, paint in details,  and they are more conducive to certain students' grasps.


My fabulous art friend also suggested using these Aqua Flow Brushes for students who may have difficulty maneuvering a traditional brush for watercolors or tempera cakes.  To use them, you need to pre-fill them with a little water and students can gently squeeze in combination with paints for more control than a regular brush.


A few other tidbits I'd like to share:

- I always have a few extra gloves (non-latex) in the Art Room for students who may experience sensory anxiety when handling materials such as chalk pastels.
- Be wary of the voice volume in the classroom.  For students who are sensitive to loud noises, extreme volume is overwhelming.  I utilize my Yacker Tracker without the siren to keep noise at bay with certain classrooms.
- Come up with a signal for students to give you when they may need assistance or start to experience frustrations.  One of my students (who is a huge baseball fan) uses a signal like baseball players do to communicate and will tug at his imaginary cap to let me know when he needs a break.
- Use clay as a grip for drawing tools or paintbrushes by wrapping it around the tools.
- Keep clipboards handy.  Sometimes students work better with their pieces close to them in their laps.
- Ensure that your lessons are accessible, yet still challenging for all your artists.

Every child is an artist and it's our job to keep the art bug going.

I would LOVE to hear any tips/tricks you have, so please share!