Showing posts with label diy. Show all posts

Sunday, April 26, 2015

Baby Kandinsky.

Last weekend, while going stir crazy on yet another gray drizzly afternoon, I decided to get a little artsy with Baby French Fry. 

 I had been reading her Herve Tullet's Mix It Up, which is a great book to use in the classroom AND at home.  It makes color mixing super understandable and the interactive qualities of the book beat an iPad any day.

Now, I don't know how much my little nugget understood about tints and shades, but she seemed to enjoy studying the different dots and brushstrokes in the book, so I'll count it as a win.

Then we got to work painting.  Our supplies included:

- Large zipper bag
- Painters tape
- Primary color paint (I watered mine down a wee bit)
- Paper scraps


 We didn't need much and got to work quickly...


She studied the paint blobs for a while before I showed her what happened when we pressed down on the paint.


I really liked the little lady's painting technique as she used her fingers and her tummy on her canvas.  Totally channeled her inner abstract artist and made it all about the process.

We are certainly looking forward to many more art dates in our home!

Sunday, April 12, 2015

April Showers.

It's tough finding an original baby mobile.  I looked around for a while and wasn't super happy with the options.  I made Baby French Fry a homemade mobile above her changing pad to keep her entertained during diaper time, but I still wanted a simple one for her crib too.
I found a mobile arm and music box  on Amazon and have been hand cutting out different designs seasonally to switch up the look.  We've gone from rain clouds to tulips and are switching out to something summery soon.
It's super simple to switch out our mobile: just untie or cut the sewing thread and attach the newest paper creation.
She seems to enjoy her cozy time in her crib as she watches her mobile and gets gently lulled to sleep.
Sweet dreams Little French Fry.


Thursday, March 26, 2015

Diy Baby Gym.

Baby French Fry is growing like a potato and I am eating up every second with this little lady.  As my maternity leave time winds down, I've had some fun creating a few projects for her, and a baby gym was one of those.
She was gifted a lovely activity mat similar to this which she cannot get enough of.  The problem I've started running into though, is that she's grown SO quickly (she's only 3 months but already the size of a 6-7 month old) that she's able to grab and easily get a hold of most of the dangling toys and I can't adjust the height of the gym.  This baby's got some long arms.

Let's hope we don't have a baby Stretch Armstrong on our hands.  Remember this guy?  Ours developed a weird old rubber eraser smell after a while, which is a smell I'm fond of in the Art Room these days...

One of my favorite bloggers at Reading My Tea Leaves, gave a beautifully descriptive tutorial on creating a homemade baby gym.  And I'm not kidding folks, everything she writes and photographs is beautiful and simply inspiring.  So, I decided to give the baby gym a shot.

All I needed were 3 dowel rods, some leather, a pack of cabone rings (find these in the knitting section at an artsy store), and a little Boy Scout knot tying. If I recall I think my dowels were 3/8" and pre-cut to 36 inches long.  You can find dowels like this at any hardware type of store or most craft stores too. I picked up the leather and cabones from my local Michaels (and couponed it up).
All I could think about when I was tying these knots was some of the fun rhymes from Boy Scouts.  I hated Girl Scouts and all its girliness (learning dance steps and cooking were sooooo not my thing) and I participated in it for less than a year, opting instead to join my brothers at their Boy Scout meetings.  Right over left, left over right, makes a knot both tidy and tight.
To make this little tipi, I just had to weave the leather over and under and then loop it back around and repeat a few times, always making sure the leather was nice and taut.
Once I finished the weaving, I just knotted the leather back on the same pole I had started at the beginning.  And voila! I had a little tipi frame that I can collapse and store in a snap.
Next up, I used the cabone rings and leftover ribbon from my hoarding drawer to create a few different baby gym accessories.  Baby French Fry has about as short of an attention span as I do, so having a few different rings to mix it up helps keep her entertained.
I love how storage-able this gym is.  Is that a word?  No?  Now it is.  We've got limited space in our home, so the more storage-able something is, the better.
Baby French Fry (and her loyal furry protector) loves her little tipi and it only cost about $8 to make, including the cost of the dowels, leather, and wood rings.
Love these ladies so much.

Thursday, February 12, 2015

Baby Blankets.

No, I'm not talking about Michael Jackson's baby named "Blanket," I'm talking about baby blankets!

Also, what the heck happened to those poor children?!

I've been on hiatus with my little French Fry the last few months, so there hasn't been a whole lot of art happening, BUT there has been a whole lot of baby love happening.


My mom is a super talented sewing machine, and she's been so tickled to be an Oma that she's whipped up a few fun artsy projects for Baby French Fry.  One of her latest creations is this totally amazing tummy time blankie.


I come from a long line of hoarders and we hoarders put our skills to good use for this project, digging up hair ribbons from when I was a little potato to attach around the blankie.  Oma even put velcro tabs around the outside so toys can be attached to the border.


 My mom sewed in multiple pocket areas to tuck in books, toys, and whatever goodies we desire.

 The floral cotton fabric and the minky fleece both came from Fabric.com and are super soft and cozy.

 Baby French Fry loves scooting around on her blankie and it's so special knowing that Oma made it especially for her.


Well, I've gotta scoot for now.  There's a Baby French Fry calling my name!


Monday, October 13, 2014

DIY Mod Mobile and Table.

Is that a watermelon under your dress or are you just happy to see me?

Well arties, it's true. It isn't a watermelon under my dress, but it is a growing Little French Fry, due December 25.

One of my 2nd grade classes has started to come up with names for Little French Fry and every week before I gather them on the rug, they can't WAIT to share their baby names.  For example:

Student 1: How about Princess?
Student 2: No no, Princess Sparkles!
Student 3: How about Ruley, Mrs. Donelan?
Miss FF: Ummm, Ruley? Why?
Student 3: Ruley, like RULES. Because you like RULES so much Mrs. Donelan!


Ya got me kid.  Ya really got me.

I've been having lots o' fun decorating the nursery for Little French Fry and finding thrifted stuff to decorate it up.  A few weeks back I picked up a table from Goodwill for $2.50 that definitely had a modern vibe about it.  The crazy thing seems to be made of broom handles for legs.  The top was really chewed up and water stained though.


But, it was nothing a little sanding and a can of glossy spray paint couldn't fix!  Perfect for a mod side table.


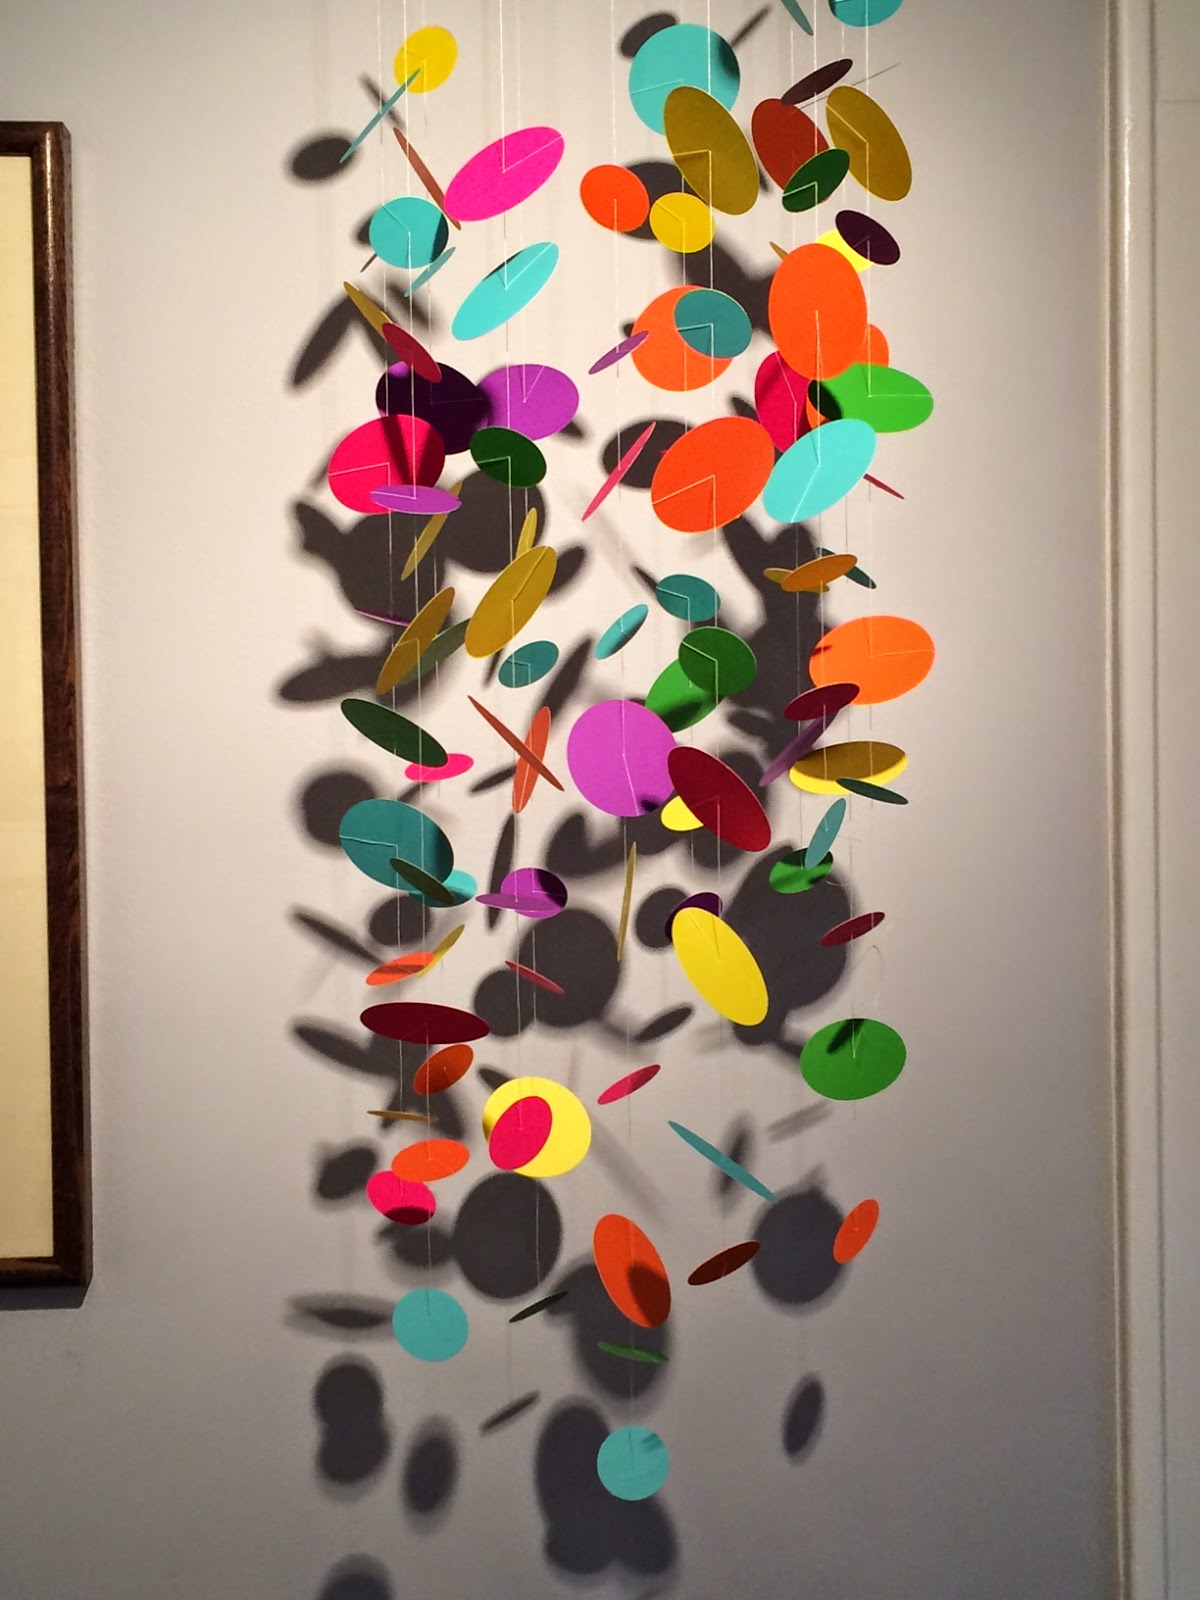
And as for the mobile.  I've made mobiles for my gal pals in the past (see here and here) and really wanted to make one for our dear little French Fry.  I had my eye on a few through Etsy, but when one of them didn't pan out, I gathered my energy and got to work!

I bought a bunch of bright colored cardstock from Michaels and used my die cutter at school to whip out a bunch of different sized circles.


Then, while multitasking and catching up on some Homeland, I got to work threading the circles together to get a random assortment of sizes and colors.

And below is the final product in baby French Fry's room.  The hubs tied on a fishing swivel so it could spin around (like a record baby, right round, round round).  It is truly mobile-y; the slightest breeze gets this baby moving! 


More photos of baby French Fry's room to come.  And I'm sure, more awesome 2nd grade names for baby French Fry to come as well...


Thursday, April 10, 2014

Smock Yeah!

Heya Arties!  Do any of you out there have that one art room peeve that makes you off-your-art-rockers CRAZAY?

My top peeve (amongst the couple of other ones I have, such as kiddos digging for gold up their little noses and those few students who are constantly word vomiting during my directions) is students asking me where their wet paintings go.

I have taught my students for quite a few years now and some of them (5th graders even!) will STILL come up to me, shove a wet painting at my nose, and ask "Where should I put it?"

Usually I respond with a deep breath and a "I do not need a wet painting.  Where would it live?"  On my days without enough coffee, my internal response probably sounds something like, "Well, kid, I'll tell ya where to put it..."  Juuuuust kidding.

Below is my quick and easy fix to ensure I don't lose my bananas one of these days.


Here's a close-up of this smock-a-roo.


Now when my students ask me where their wet paintings go, I just do a simple point to my smock, and keep on keepin' on.

I'd love to hear what your tips and tricks are for peeves such as these!

Wednesday, February 19, 2014

Party in the USA, Part Two.

Hey babe, let's take a walk on the wild side...

For my next part-ay feature, we're gonna check out the jungle-themed shower I threw for my dear high school friend having twin boys.  If anyone can handle twins, it's this chick: she is one tough cookie.

Now, I'd be "lion" if I said I didn't want to do homemade invites.  I SO wanted to and I came up with some fun ideas, but again, same story: not enough time.

So, Zazzle to the rescue!  Again, the image is a screenshot from their site so don't try and come over for tea at my home in Frisco, TX.  Not even sure where Frisco is...


I made the pennants on the fireplace from leftover animal-y scrapbook paper I had at school.


I cut a bunch of zebra grass and allium from my garden to decorate the mantle and the dining table.  Free flowers are the best flowers!


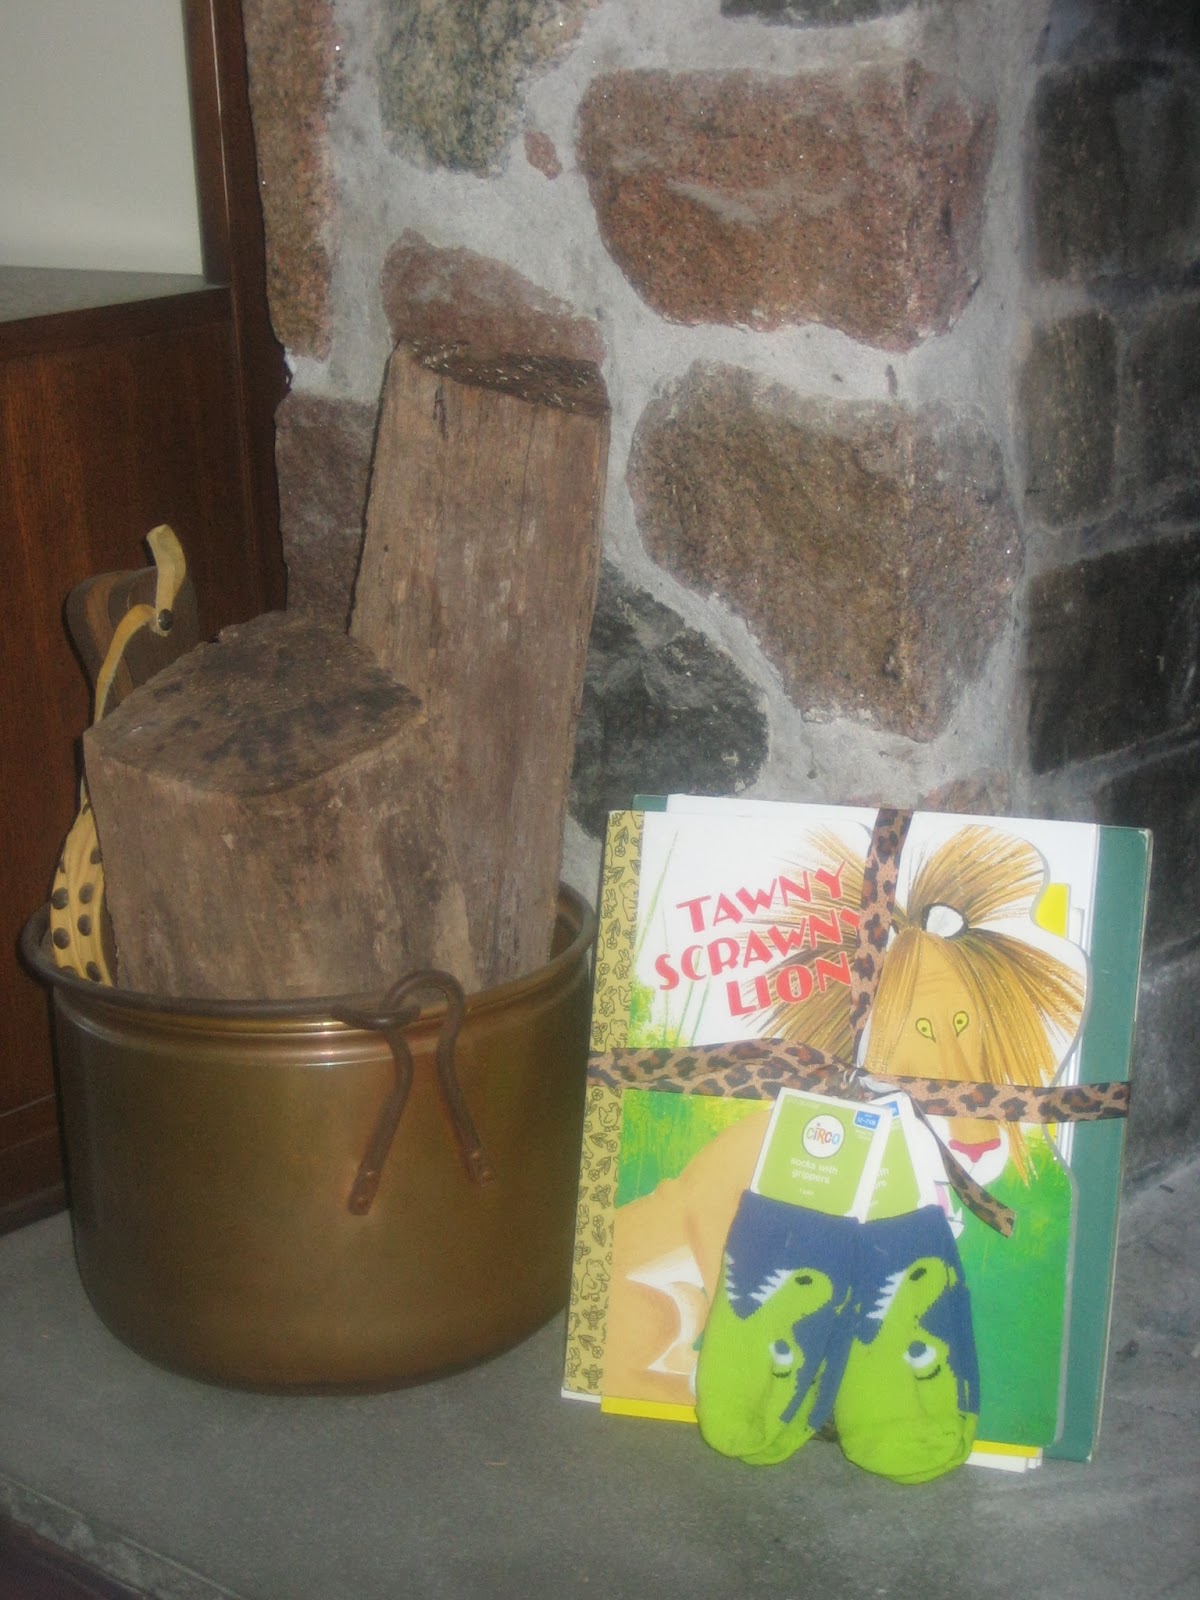
Part of my gift to the future momma was a collection of jungle-themed classics such as The Scrawny Tawny Lion, Where the Wild Things Are, and Jumanji.


Hand-drawn chalkboard decor and Ostrich fern


I decorated the table with zebra wrapping paper to keep it on the cheap instead of buying a brand new tablecloth.


Thrifted silver tray and borrowed African giraffes from my mom.  The flower vase is an old science beaker from mi esposo's place of work.


I had WAY too much fun putting together the menu for this shindig and my fabulous friend helped out with the food in a big way.  Enjoy these tantalizing treats!


Walk on the Wild Side Menu

Beverages:
  • Jungle Juice (not like the kind we used to have in college)

Dinner:

Dessert:
  • Zebra Chow (pretzels and Hershey hugs)
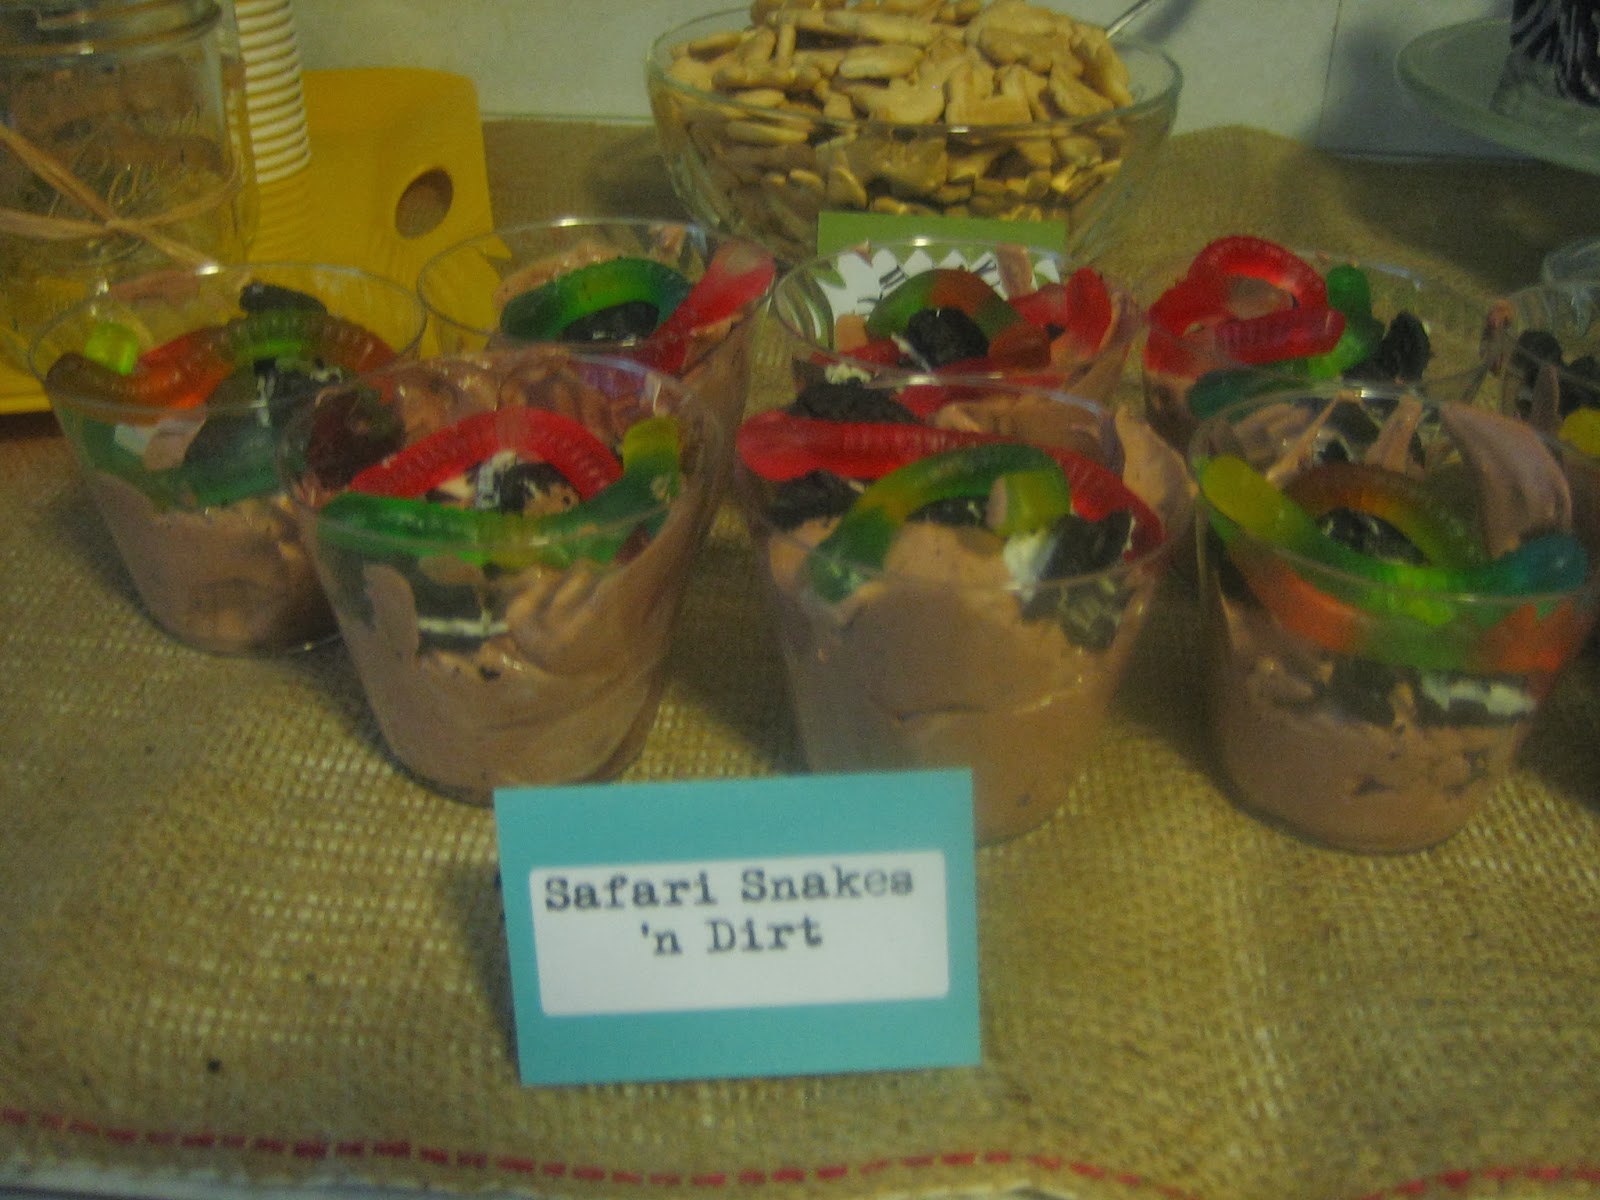
  • Safari Snakes 'n Dirt (pudding, oreos, and gummy worms)
  • Animal Crackers
  • Zebra Cakes (red velvet cupcakes and cream cheese icing)
  • Spotted Leopard Cookies (chocolate chip cookies)


I gifted the momma-to-be a handmade baby mobile.  The mobile was constructed from a birch tree branch I picked up in Door County.  I drew and cut out the jungle animals from scrapbook paper.  Then, I used a needle and thread to gently pull the thread through the paper animals.


Annnnd finally, the guests lucky enough to attend this shower received a customized mason jar stuffed with animal crackers.  I picked up these jars real cheap at Walmart along with the plastic animals, which were glued on with my good ol' trusty glue gun.  Quick spray paint job, and BAM: jar-tastic!


Don't know about you, but the biggest kick I ever got, was doing a thing called the Crocodile Rock.  Have you tried it yet?